Expense Category Configuration
Creating Expense Categories in PayExpense with Policy Configurator
PayExpense's policy configurator, also known as the metadata section, allows you to define and manage various expense categories for your organization's reimbursement policy. Here's a breakdown of how you can create basic categories like Travel Expense, Business Expense, and Regular Expense using the policy configurator:
1. Accessing Policy Configurator:
The specific steps to access the policy configurator might vary slightly depending on your PayExpense version. However, it's typically located within the Settings or Admin section of the platform.
2. Creating Expense Categories - Expense Group creation:
- Travel Expense:
- In the policy configurator, navigate to the section for creating or managing expense categories.
- Click "Add Category" or a similar option.
- Name the category "Travel Expense".
- (Optional) You can add a brief description of the category to clarify what types of expenses fall under this category (e.g., "Expenses incurred during business trips").
- Save the newly created category.
- Business Expense:
- Repeat the steps above to create a new category named "Business Expense".
- (Optional) Consider adding a description that differentiates it from Travel Expense (e.g., "Expenses related to general business operations outside of travel").
- Regular Expense:
- Follow the same process to create a category named "Regular Expense".
- The definition of "Regular Expense" might vary depending on your organization. It's recommended to clearly define this category in your policy documents to avoid confusion for employees.
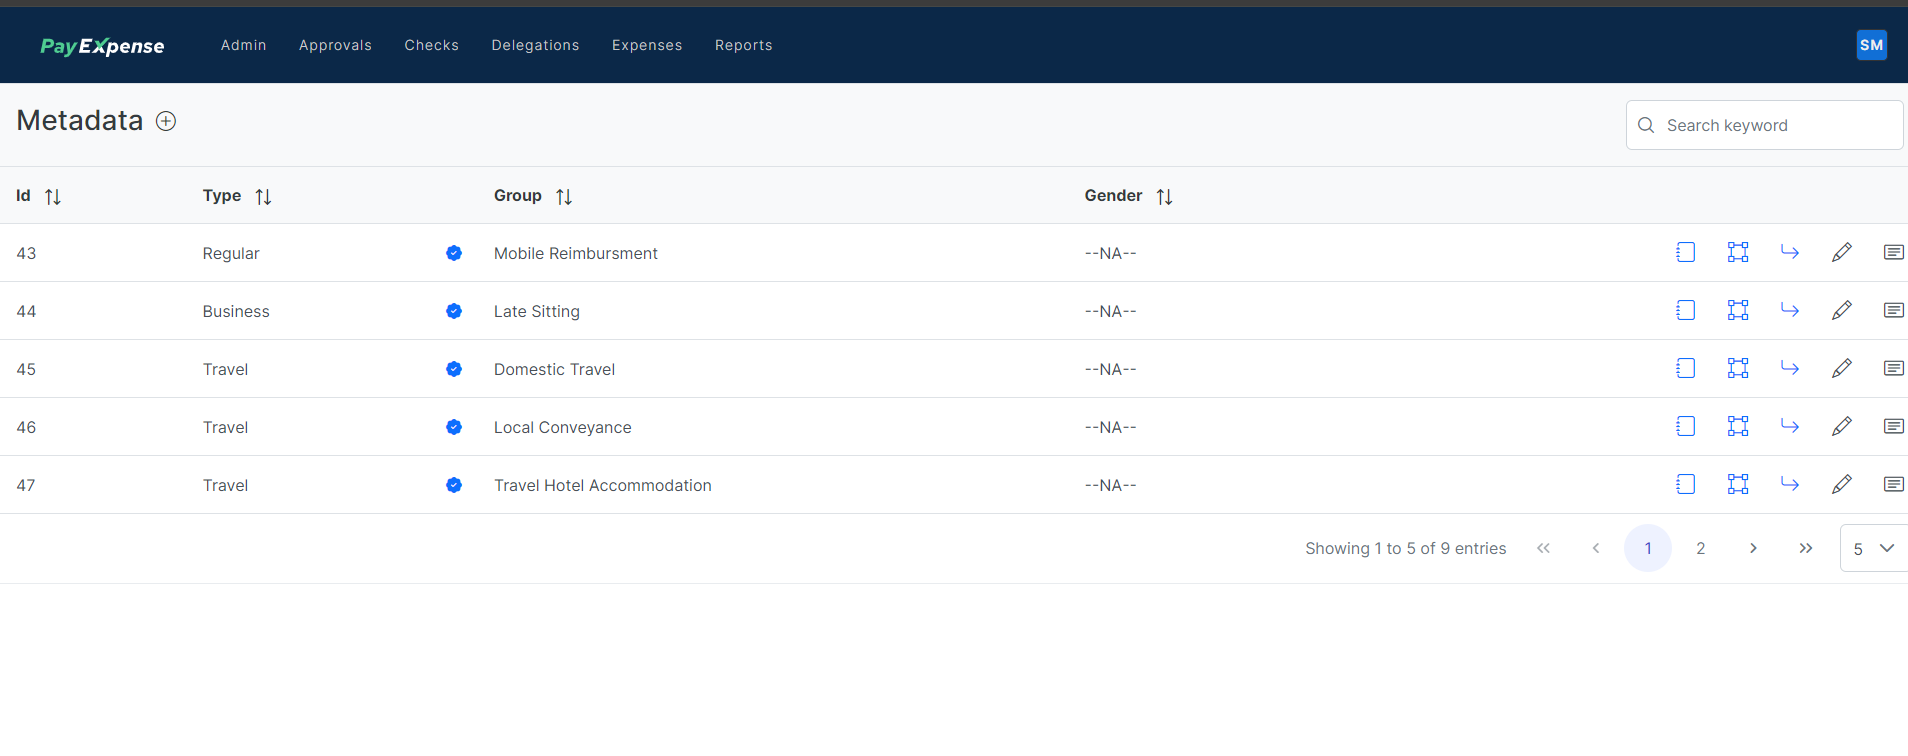
Following are the steps for Expense Group creation for expense category:
Step
1:
On
After creating Expense Group we can create Subgroup,
Information to be filled in:
Expense type name:levelExpense type prefix:Expense Group:Expense Group PrefixDescription:Limit daysApplicable Gender:Purpose:
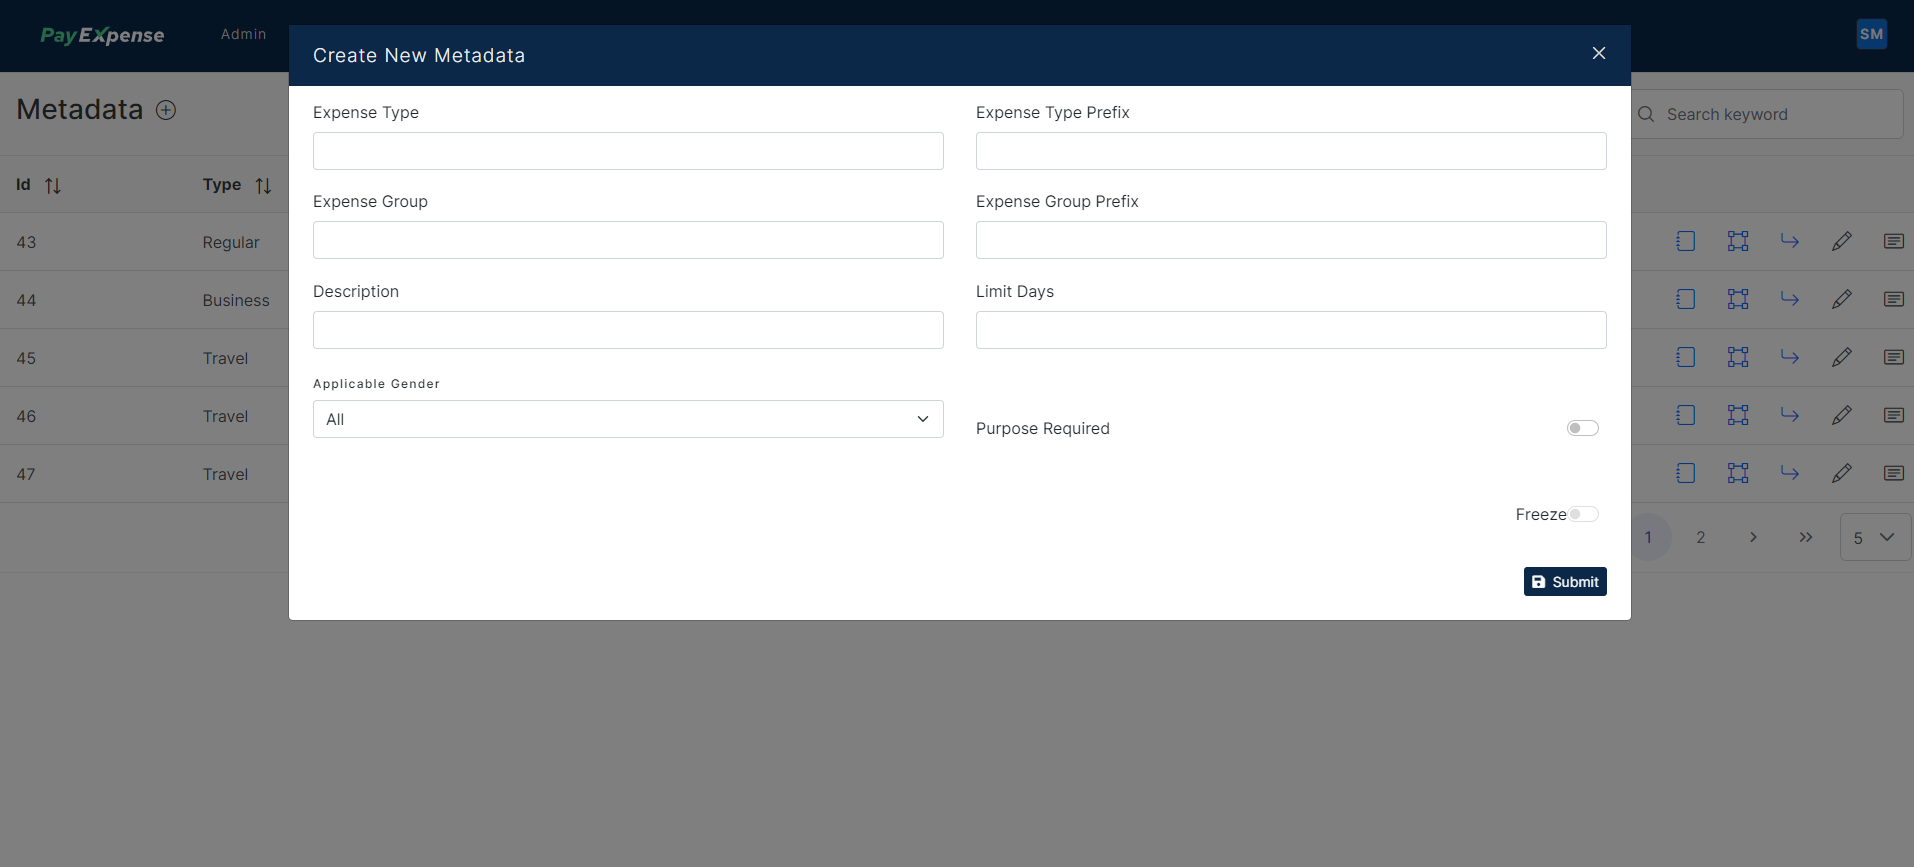
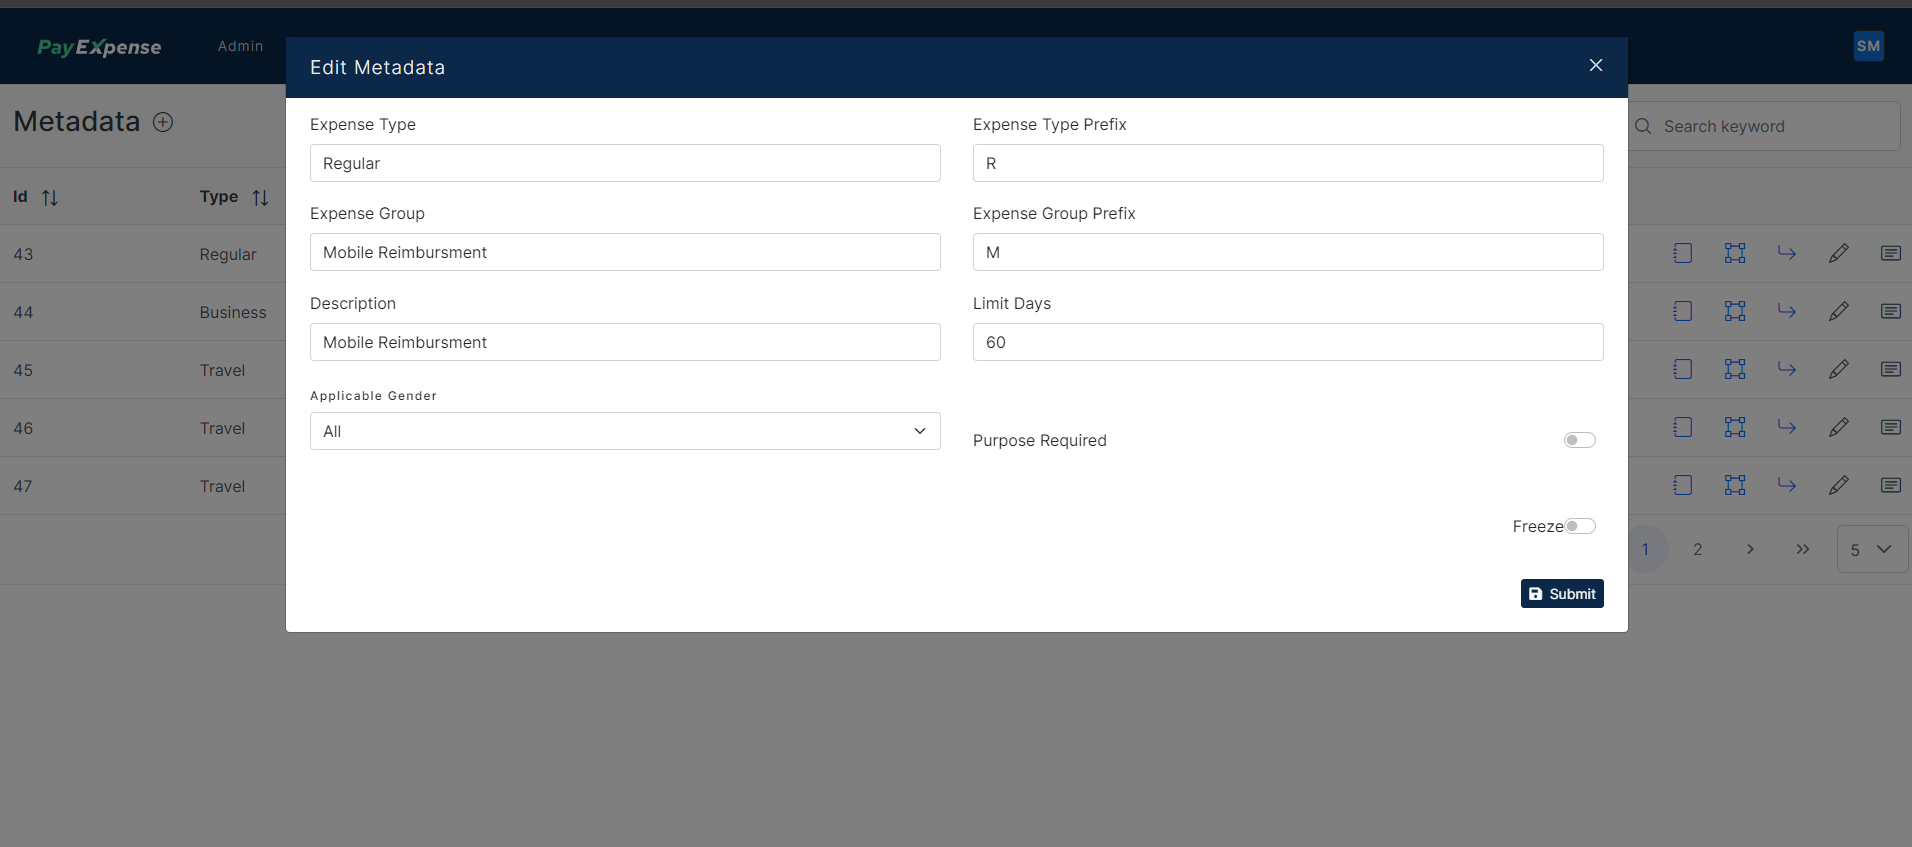
Example:
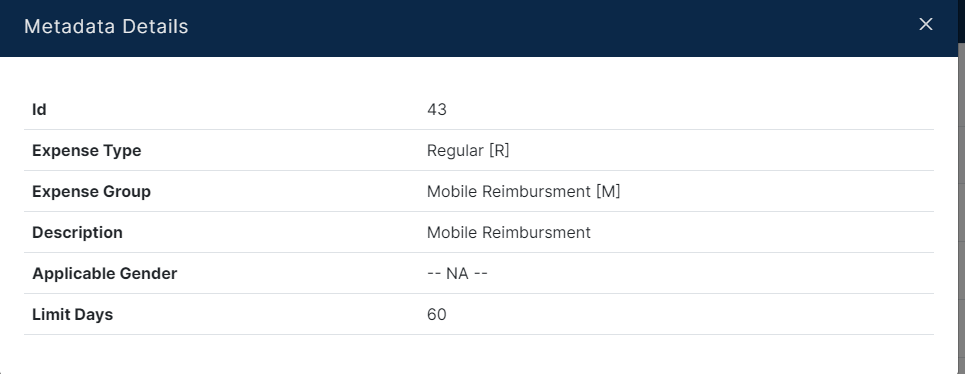
Expense type name: RegularExpense type prefix: RExpense Group: Mobile Re-imbursementExpense Group Prefix: MDescription: Mobile Re-imbursementLimit days: 60"Limit Days" defines a timeframe (in days) to recapture or recover past-due expense report data within your expense management system.Applicable Gender: All
All means, its applicable for all Gender type configured in system.
Purpose: Off / ON
This field is configuration, if its ON then user need to enter purpose for capturing this expense and of its OFF system wont show this field.
Read from right to left
Know details / Edit policy / Meta data group:Understand & configure expense categories (travel, meals, etc.) for your organization.Create subgroup:Further categorize expenses within existing groups (e.g., "Meals" subgroup under "Food & Drinks").Create monthly limit rule:Set spending thresholds per category for each month (e.g., max ₹100 for office supplies).Definition (approval limits - min. to max.):Establish minimum & maximum spending amounts requiring manager approval.
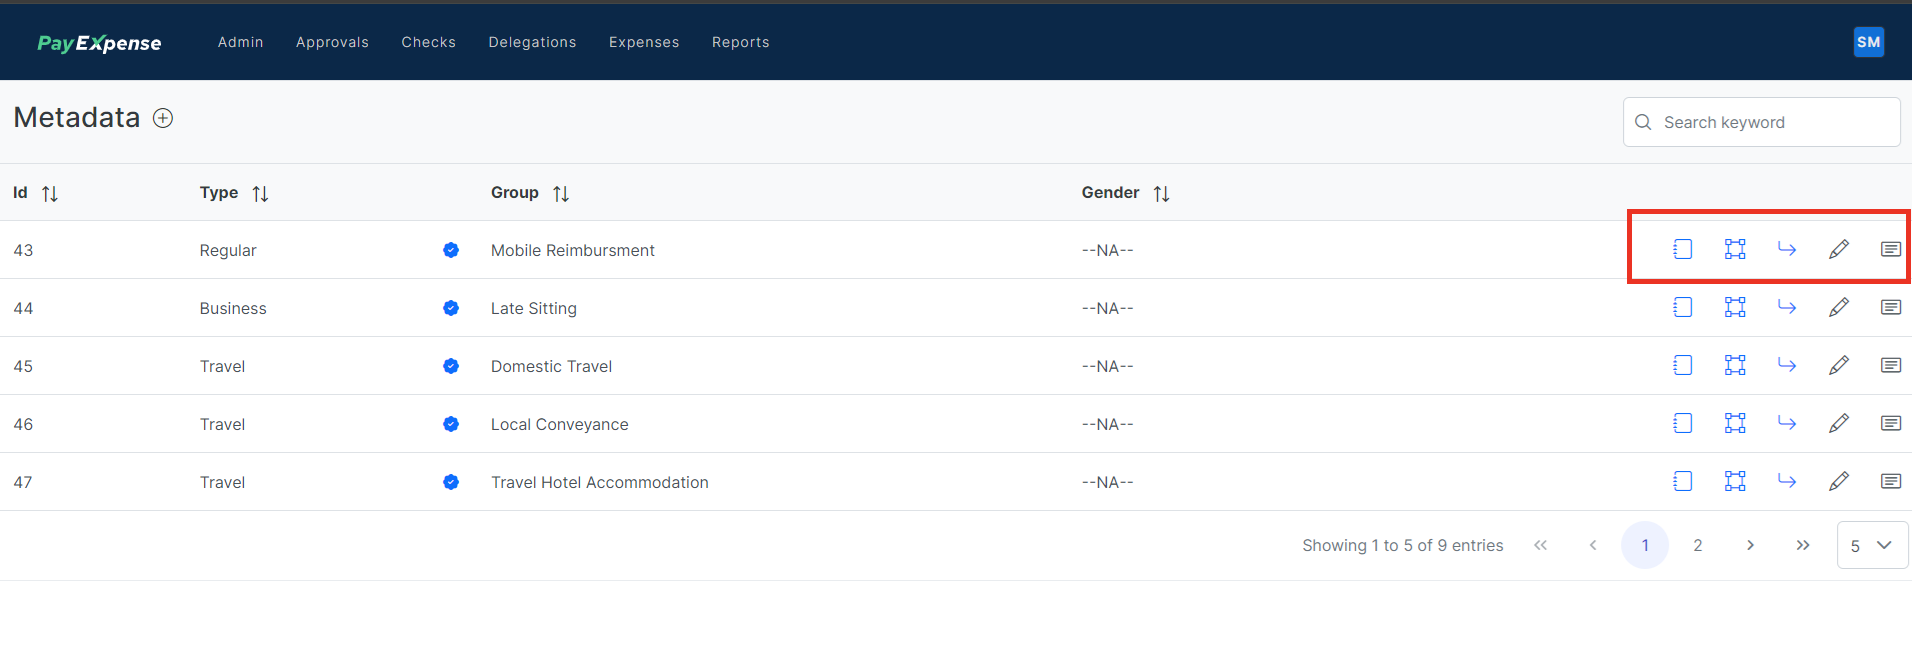
Lets check each of them in detail:
Know details / Edit policy / Meta data group:Understand & configure expense categories (travel, meals, etc.) for your organization. Information updated while creating policy / meta data can be viewed by usingknow details.
3. Adding Subcategories -Creating Sub Group:
PayExpense might also allow you to create subcategories within these main categories. This can further enhance organization and clarity for specific expense types.
This is third button from either (right / left) side.
For example, you could create subcategories under "Travel Expense" such as:
Transportation (flights, trains, taxis)Accommodation (hotels, AirBnB)Meals (per diems, individual receipts)Local transportation (buses, cabs)Miscellaneous travel expenses (airport fees, travel insurance)
After Creating Expense Group we have to add definition and Group Level Rule for the group Expense. We can add definition as Shown below.

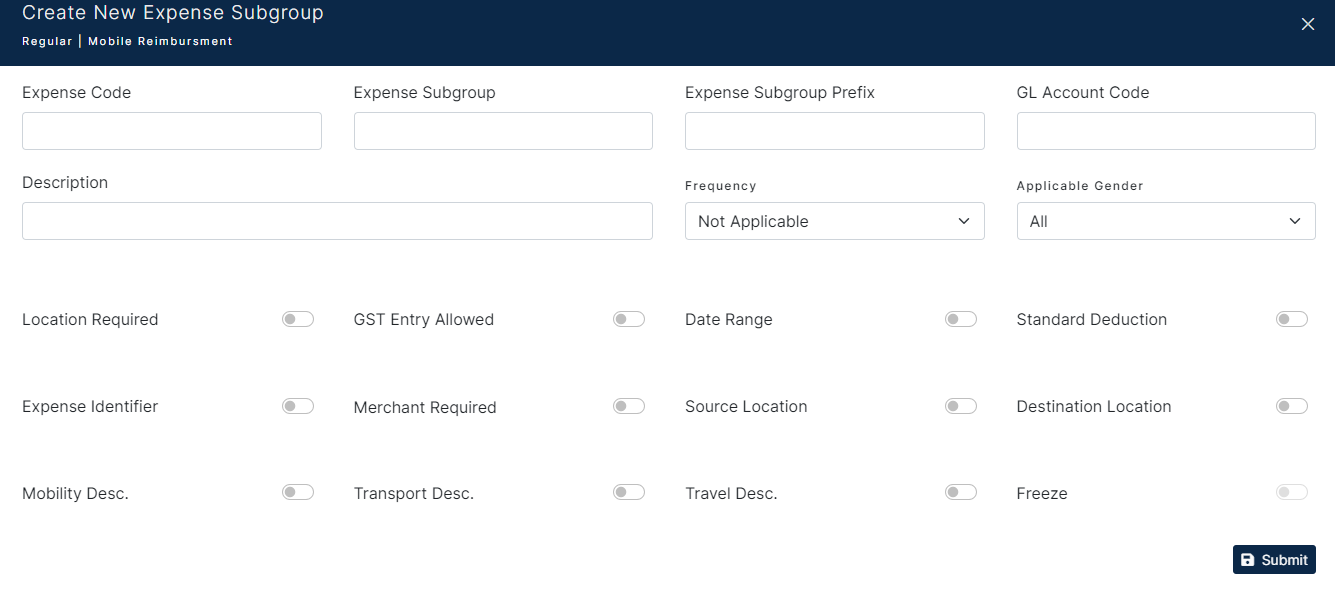
1. Sub Expense Creation for a Group Policy:
Explanation:This allows you to create more specific expense categories within a broader group.Example:You could create a group called "Travel" and then create sub-expenses within that group, such as "Flight", "Hotel", and "Meals".
2. Linking Expense to GL (General Ledger) for Posting:
Explanation:This functionality enables you to connect expense categories or sub-expenses to specific General Ledger accounts within your accounting system (e.g., SAP). This allows for automatic posting of expenses to the appropriate accounts during processing.Benefits:Streamlines expense recording and reduces manual data entry errors.
3. Frequency Definition:
Explanation:This allows you to define how often a specific sub-expense is expected to occur. Options might include monthly, quarterly, bi-annually, or annually.Benefits:Helps identify recurring expenses and streamline budgeting processes.
4. Gender-Specific Expenses (Optional):
Explanation:Some expense management systems might offer the option to designate sub-expenses as gender-specific. This could be relevant for certain industries or company policies. However, it's important to consider potential compliance and inclusivity implications before using this feature.
5. Field Configuration based on Sub-Expense Type:
Explanation:This allows you to define specific fields that appear during expense creation depending on the chosen sub-expense category.Example:For "Flight" expenses, you might require fields for departure and arrival airports, while "Hotel" expenses might require room type and confirmation number.Benefits:Ensures employees capture relevant informationfor each expensetype, improving data accuracy.type
Overall:In later chapters we will be exploring more in details about each of above
These features within PayExpense (or similar expense management systems) empower you to create a highly granular and efficient expense management system tailored to your organization's specific needs.
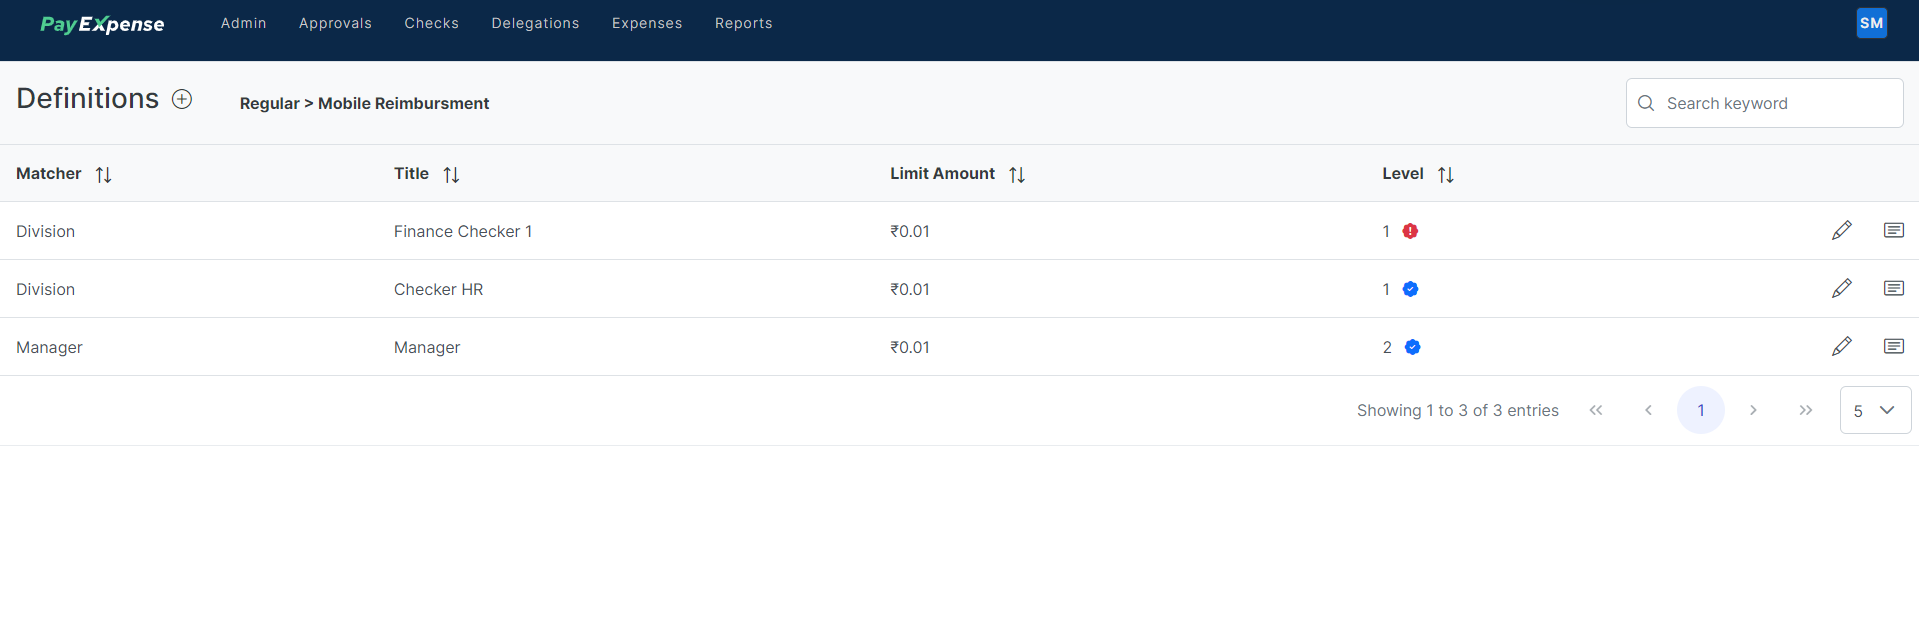
Approval Matrix Definition: Streamlining Expense Approvals
An approval matrix defines a set of rules that determine who reviews and approves expense reports within your organization. It essentially maps out the approval workflow for expense claims.
Here's a breakdown of the key aspects:
Approval Limits:You can set minimum and maximum spending thresholds for each expense category. Expense reports exceeding these limits require approval from designated individuals.Assigning Approvers:You can designate specific employees to review and approve expense reports. This can be based on factors like department, location, cost center, or employee hierarchy.Approval Workflows:The matrix defines the sequence or structure of the approval process. Here are some common types:Sequential Approvals:Expense reports are reviewed and approved by one person at a time, following a predefined order. (e.g., Manager -> Department Head -> Finance)Parallel Approvals:Multiple approvers review and approve the report simultaneously. This can be used for specific expense types requiring input from different departments.Same Level Parallel or Sequential:Approvals can be set up where multiple individuals at the same level (e.g., Team Leads) need to approve sequentially or simultaneously, depending on your needs.

Moreover, admins in PayExpense (or similar expense management systems) can configure deviation rules for additional approvals based on specific scenarios. Here's how it works:
Deviation Rules for Additional Approvals:
Policy Configuration:Within the policy configuration settings, admins can define criteria that trigger additional approvals beyond the standard approval matrix.Common Deviation Triggers:Here are some examples of scenarios that might warrant additional approval:Exceeding Spending Limits:If an expense report exceeds the pre-set spending limit for a specific category, the deviation rule can route it to a higher-level approver for review and authorization.Policy Exceptions:For certain expense types or situations, the policy might require additional approvals regardless of the amount. Deviation rules can be configured to handle these exceptions.
Benefits of Deviation Rules:
Enhanced Controls:This functionality provides an extra layer of control over expense approvals, ensuring adherence to spending policies.Flexibility:Deviation rules allow for exceptions without compromising the overall approval structure.Reduced Risk:By requiring additional approvals for specific scenarios, you can mitigate potential risks associated with non-compliant or excessive expenses.