Branch Master in PayExpense
The Branch Master section within PayExpense allows administrators to manage your organization's branch locations. Here's a breakdown of its functionalities:
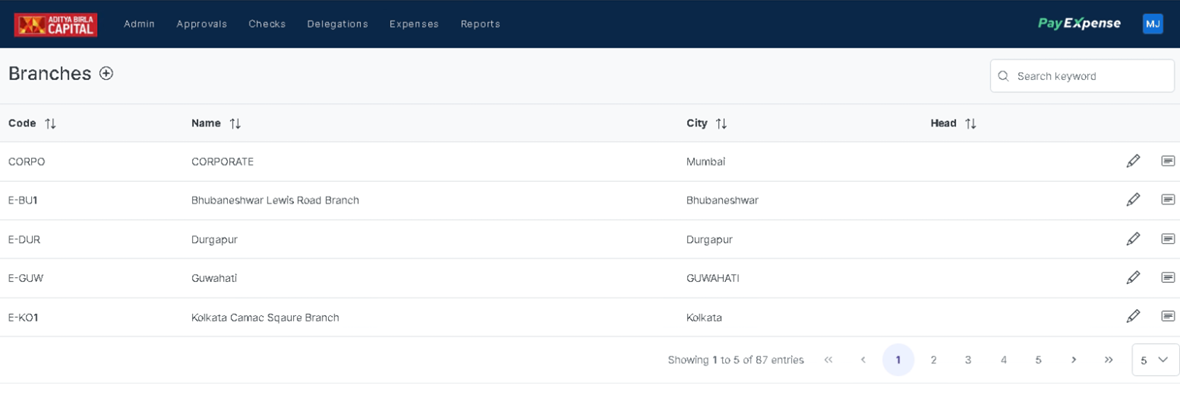
Viewing Existing Branches:
- Accessing Branch Master: Locate the "Branch Master" or a similarly named section within PayExpense.
- Branch List: This section likely displays a list of existing branches within your organization. The list might include details such as:
- Branch Name
- Branch Address
- Location (City, Country)
- Contact Information (Optional)
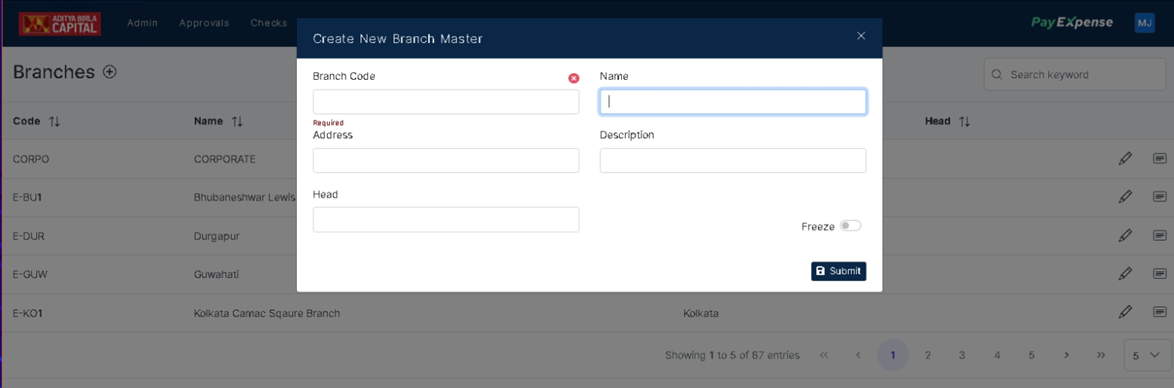
Creating New Branches:
- Adding a New Branch: Click the (+) symbol (or a similar button) typically found within the Branch Master section.
- Adding Branch Details: A form might appear where you can enter information for the new branch, such as:
- Branch Name
- Branch Address (including City, Country)
Benefits of Branch Management:
- Accurate Reporting: Maintaining an accurate branch list ensures proper expense allocation and reporting based on branch locations.
- Improved Controls: Defining branches can be used for setting location-specific expense policies or restrictions.
- Enhanced Visibility: Provides a clear overview of your organization's branch network for better management and decision-making.
Additional Considerations:
- Branch Hierarchies: PayExpense might allow defining branch hierarchies (e.g., regional offices, sub-branches) for more granular control.
- Department Association: Some systems let you associate departments with specific branches for more precise expense tracking.
- User Permissions: Branch information might be linked to user permissions, restricting access to expense reports or approvals based on location.
By effectively utilizing the Branch Master section in PayExpense, admins can maintain a well-organized and efficient system for managing your organization's branch network and associated expenses.